faban.org

Faban Quick Start Tutorial

Table Of Contents

Introduction
Installing Faban
Starting Faban
Deploying the CoreHttp Workload
Scheduling a Test Run
Viewing Results
Next Steps
Learning More


Introduction

Faban provides a framework for developing workloads (called the Driver Framework) and a mechanism for run execution and management (called the Harness). 
This tutorial will take you through the steps of installing Faban and deploying a pre-existing workload from the workload repository. We will use the "Core HTTP workload" but the steps are exactly the same for any workload.

Installing Faban

  1. Download Faban anywhere - it is about 35MB in size.
  2. Decide on where you want to install it. This is the faban home directory and we will refer to it as $FABAN_HOME. We will use /opt/faban as $FABAN_HOME.
  3. Change directory to $FABAN_HOME/.. and untar faban. You're done.
These steps are shown below. For a system where tar does not support the '-z' option, you may have to first uncompress the downloaded file before untaring e.g. on Solaris you would use : gzcat faban1.0.tar.gz | tar xvf -

$ cd /opt
$ tar -xzf /tmp/faban-kit-latest.tar.gz
$ cd faban
$ ls
README              javadocs.zip        release
ant                 legal               resources
benchmarks          lib                 samples
bin                 logs                services
build.properties    master              src.zip
build.xml           nbproject
config              output
$


Starting Faban

You interact with the Faban Harness a browser. The Harness (called the Faban Master) lets you deploy workloads, schedule runs, view results of completed runs etc. Faban requires a full JDK installation - a minimum of JDK 5.0 is required, although it is preferable to have JDK 6. Some systems may have just the JRE installed. In this case, you may have to download and install the JDK. First set JAVA_HOME.

Platform
Typical Value for JAVA_HOME
Ubuntu
/usr/lib/jvm/java-6-sun
Fedora/RedHat
/usr/lib/jvm/jre-1.6.0-openjdk
Solaris
/usr/java
MacOS
/System/Library/Frameworks/JavaVM.framework//Versions/1.6.0/Home

Now start the Faban Master.

$ echo $JAVA_HOME
/usr/java
$ master/bin/startup.sh
Starting Faban Server
Please point your browser to http://localhost:9980/
$


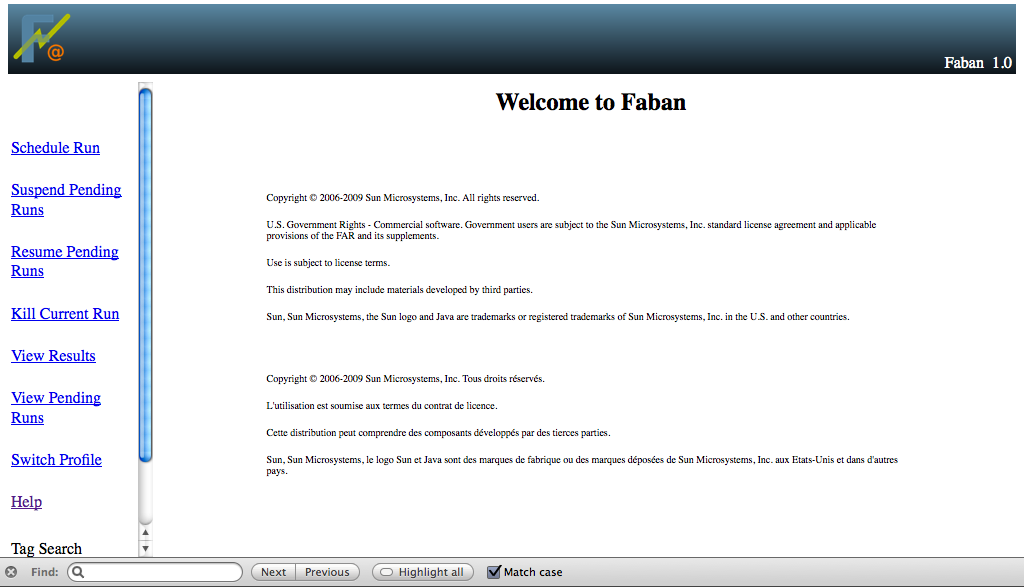
Point your browser to the host on which you started Faban using port 9980. You should see the following :

Faban Screen-shot

Deploying The CoreHttp Workload

Before we can schedule any runs, we first need to deploy a workload. For this tutorial, we will use the CoreHttp workload which tests a single URL on any web site. CoreHttp is part of the workloads repository on this site. Download the deployable jar (not the whole kit) anywhere on your local system. To deploy the workload, point your browser to http://localhost:9980/deploy and enter 'deployer' for LoginID and 'adminadmin' for the password. Enter the path to the downloaded corehttp.jar.
You should see the following :


Click Deploy and the workload should be deployed.

Scheduling a Test Run

With the workload successfully deployed, we can now kick off a performance test. We will use the TestnScale website for a small test. A word of caution: Do NOT run a large load on any site that you do not own or you could cause severe performance problems. Go back to the home page of Faban and click on the Schedule Run link in the left frame. The first time you do this, you will be asked to select a profile. You can associate a profile and tags (space separated) for a particular workload or for a series of experiments. The profile saves the parameters associated with it, so you don't have to type these in for every run. For example,  we will associate a profile called 'testnscale' for the tests we are going to run against the TestnScale URL. If you want to later run the workload against a different site, click on the Switch Profile link on the left frame and create a new profile. From that point on, all runs will use the new profile.

Screen-shot of
      Profile creation


On clicking the Select button, you should see the parameters form for the CoreHttp workload. Each workload will have it's own parameters form based on what customization the workload developer allows.

JVM Parameters

Enter the JVM home directory. This is the value of JAVA_HOME you set earlier. DONOT click Ok ! We need to first enter the parameters in the remaining tabs.


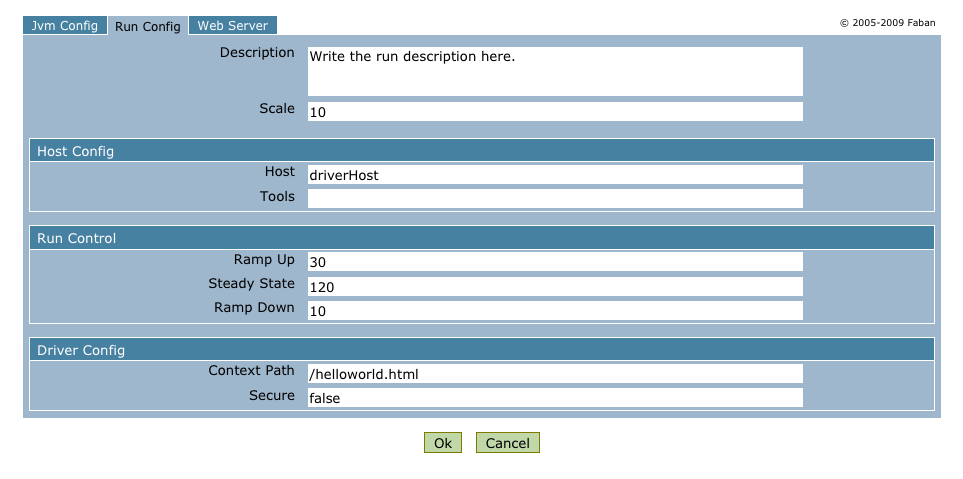
Run Config Parameters

Click on the Run Config tab. Here you will see parameters associated with the driver and how it should connect to the server.


Enter Test run for static html for the Description field. Enter the hostname or ip address of the driver system (the system you started Faban on) for the Host field. Do not use the name 'localhost' - a valid ip address is required. Leave all other parameters at their default values. DO NOT click Ok yet !

Web Server Parameters

In this tab, you will enter parameters related to the web server you are running the load against. The default values are fine. Click Ok.


The run is now scheduled and you will see the RunID associated with it.


Viewing Results

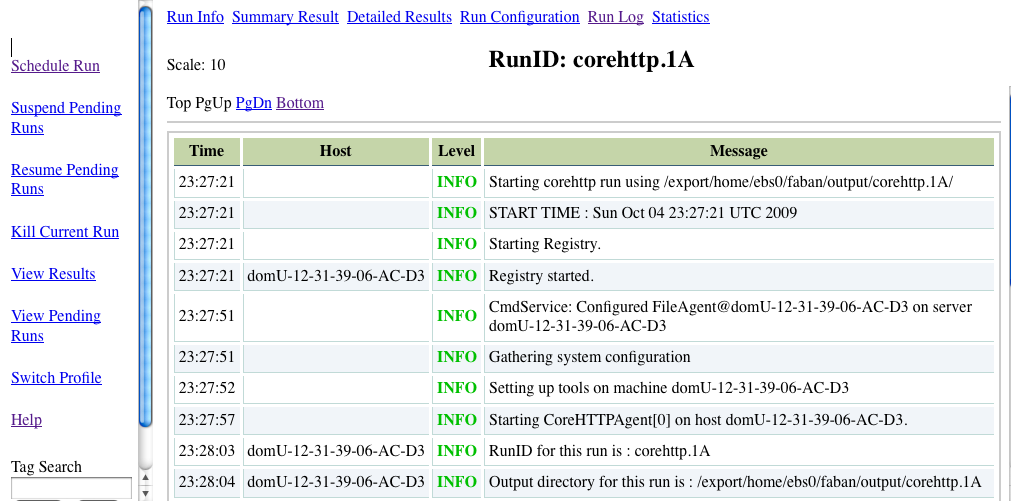
Click on the RunID link shown. This will take you to the Run Log and you can view the progress of the run. You can view the results of this and all past runs by clicking on the View Results link in the left frame and then clicking anywhere on any run row. You can also search for particular runs by typing in a tag under Tag Search.


Here is a brief description of the various links in the Run Output window :

Next Steps

You can do any or all of the following :

Learning More


All Rights Reserved. See Terms and Conditions.